Sunday, February 27, 2011

Christmas Photography Tips and Advice


Edinburgh Photography, Double Yellow by John Gilchrist


Photo Credit: celtics baby clothes


For Christmas photography tips, or any sort of photography, we want the best results to come from our time and effort. Christmas photography captures special moments, especially when children are involved. In fact, this leads to my first Christmas photography tip:

(1) Focus on the children first. This admittedly is a bias of mine, but Christmas foremost should be a children's holiday. This applies to gift-giving, and also to photography. If you disagree and/or if adults are at the center of your Christmas, fine, that's just my opinion. Just think of ol' Art Linkletter: "Kids Say the Funniest Things." Kids also make the best photo subjects, and regardless, Christmas (like Trix cereal) is for Kids.

Our Top Ten Christmas photography tips are going to relate to the strategy of taking the best photos, not to the type of camera. That's a whole 'nuther topic. In fact, yours truly is not even a shutterbug. My advice comes from working as a local daily newspaper reporter, among some of the best professional photographers, going back to the 1970s when they still used darkrooms, up to today in the digital age. These Christmas photography tips are geared toward how you interact with your subjects, once the camera is chosen and the lighting adjustments are made.

(2) Don't be one of these photographers who is constantly out front and interrupting things, asking people to pose. For your best Christmas photography, be the fly on the wall. Stay in the background and take candid photos of what's happening, photos in which the subjects don't realize you're taking their photos.

(3) A lower angle (shooting "upward" toward the subjects and the scene) often yields better results. Don't hesitate to sprawl on the floor.

(4) In your Christmas photography, look for sequences of events. A photo is just one moment in time and to capture a sequence, many folks nowadays prefer a video camera. Still, there's nothing like a series of photos. For example: (A) Child awaits anxiously for gift-giving to begin. (B) Child receives wrapped gift. ( C ) Child tears wrapping off of gift. (D) Child reacts to gift.

(5) In fact, your sequence of events could begin hours earlier. Child helps decorate tree. Child puts on Christmas outfit. Etc.

(6) Just because you're staying out of the spotlight with your camera, that doesn't mean you can't be persistent. Patience is a virtue in waiting for just the right moment, just the right shot.

(7) Be a minimalist. Don't try to illustrate the whole scene of the Christmas event at once. If it's a party, take turns focusing on individual participants, or no more than two or three in one frame. If your Christmas photography involves a group of carolers, go ahead and photograph the whole group, but also aim for closeups of one caroler, or a small group.

(8) If you still want some posed Christmas photography for the archives, that's fine. Try to do the posing at the conclusion of the shindig, not at the start or during the middle.

(9) For posed photos, try to keep the number of subjects small. Let's imagine the group of Christmas revelers is 20. Go ahead and shoot the group of 20, but keep in mind that with so many folks in there, their faces are going to be the sizes of dimes. Also shoot "subgroups" with three, four, five people.

(10) When people pose in groups, have them put their heads as close together as possible. This may seem like a minor point, but when you see the results, you'll understand. Faces can be 20 percent larger and up close if we eliminate the wasted space between their heads.

SOURCES

Personal experience

http://digital-photography-school.com/16-christmas-photography-tips

http://www.best-family-photography-tips.com/Christmas-pictures.html

http://photography.about.com/od/christmas/Christmas_Photography.htm

Using Depth of Field for Photography


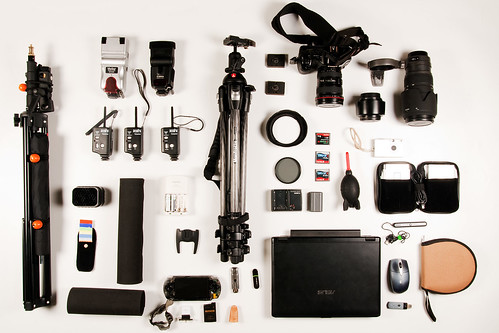
Photography in a Rucksack by Daily Travel Photos .::. Pius Lee


photo source


It's one of the greatest tools available to photographers, it's easy to use, and yet it's among the least known and used abilities of a camera today. Pro photographers have used it for decades, but the amateur can use these same techniques without paying the professional price. It's called depth of field, and it's accessed through the use of the aperture.

The aperture, simply put, is the hole that light comes through in your camera. Light passes through the front of the lens, through a series of glass pieces, through a hole at the back of the lens, and into the camera. The aperture is the hole in the back of the lens, and you get to control this vital part of the camera, if you decide to want to bump up your pictures. You can place the camera on auto, and the camera will adjust its aperture, shutter and more to the situation it sees. By placing the camera in more manual modes, you take on powerful and personal control, and YOU get to decide what you want to create with your photographs.

An important factor here is lighting. Any photography relies heavily on the lighting that you are using, whether it be from the natural, ambient light around you, or artificial light, like a strobe or other flash unit. Especially while using natural light, it will be important to use a tripod to keep the camera steady while shooting. If you are shooting on a cloudy day, without much light, then the camera must compensate for less light by having a longer shutter speed, which it will do automatically in the mode I'll be explaining in a moment. A longer shutter speed means the camera won't be able to have a clearly focused picture without the use of the tripod.

Depth of field simply means the area of focus, or the area in the picture that is in focus might be a more accurate term. Photography is a two dimensional medium, having height and width, but it lacks depth, the third dimension. Your photography can create the illusion of that depth through a few easy camera settings. You may be asking yourself, why would I want to create the illusion of depth, and what is it good for? Part of the reason is to create a sense of emphasis. When you take a picture of a large area, with trees, birds, squirrels, people, rocks, etc, what is the thing or object that you are zeroing in on? Is there anything that you really want to emphasize to your viewer? If so, it's probably getting lost in the crowd of other things on the scene. The squirrels are so small you can barely see them, the people are walking their dogs, and the trees are swaying in the breeze. But what if you wanted to focus on the viewer on the flowers in the garden? When you create emphasis on an object, it strengthens your photo, and actually guides the eye of the viewer to that object. You could take pictures to create a story about that, as you can read in my article about photo stories. When you get in to take close-ups of the flowers is where the possibilities of great photography begin.

Emphasize the garden by focusing in on one or two flowers at a time. Grab a tripod, get down to eye level with them, and then get ready. Place your camera in a mode that allows you to change your aperture; the mode is usually called "A", or "AV" on some models. Film cameras can allow these changes too, on SLR models. They require you to simply change the f-stop manually on the aperture ring. On your digital camera, use your selector buttons to change your aperture. You'll see on your digital camera, most likely, a letter f, with the number on the readout on either the monitor, or the info panel on the top of the camera, or perhaps both areas. The f means f-stop, which is the name commonly used to describe the number of the aperture setting. The best way to emphasize a flower is to have only that flower in focus, and to have the rest out of focus. Change your aperture to a really low number, such as 2.8, 4, or 5.6. When the lens is at a low number like this, the lens hole is wide open, but it is creating a small area or depth of field; basically an inch or two will be in focus. Focus your camera, and shoot. Now, look at the camera, and look at your pictures. The one or two flowers should be in focus, but do you see how the background is fuzzy and out of focus? This is what is called a "shallow depth of field", and that comes from using a small number f-stop. That's because you've taken control of your camera, and changed the outcome! Because only the flower is in focus, and the rest is blurred out, you have guided your viewer to what YOU want to emphasize! You have used one of the most powerful tools available for a photographer to bring a new focus to your pictures. Try this with a lot of different scenes; look how the item is forced to really stand out for you because it's the only thing in focus.

Now, on the opposite end of the spectrum are the pictures that have the entire photograph in focus; such as a lighthouse standing out from the beach, with horseshoe crab shells in the immediate foreground. This is also done by changing the depth of field of your camera. Here, you again change your aperture, but this time place it on a high number like 16, 22, 28, etc. This is to create a large depth of field by using a small hole in the back of the lens. Again, you must use a tripod to keep the camera steady. Take a picture with something in the near foreground, such as a rock or the crab shells, and then compose your picture with a mountain or some other object some distance away, focus, and shoot. Remember to use the rule of thirds here for additional emphasis. As you'll see, both areas should be in focus, again showing the third dimension and creating the illusion of depth. This is a large depth of field.

It's a little known tool in the photographer's toolbox, but almost any camera made in the past four years will have some sort of ability to work with depth of field, whether they have a point and shoot or DSLR. Every photographer, of every level, has the ability, through practice, to create beautiful photographs that can rival those of the pros, by using the tools available with every camera. Use the strength of depth of field when you create the third dimension in your photographs, and add a new and incredibly
powerful personal dimension to your photography.

Saturday, February 26, 2011

10 Great Tips to Make Any DIY Winter Wedding Photography Successful!


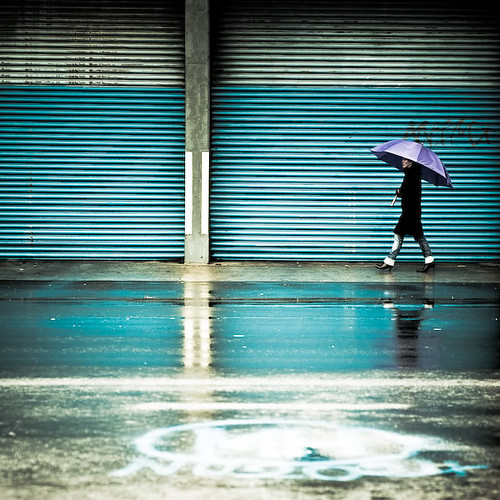
Cuba Gallery: Blue / rain / reflection / urban / graffiti / umbrella / walking / woman / street photography by â–ºCubaGallery


source,photo source


This winter many couples are choosing do it yourself wedding photography in an attempt to save money. Wedding photography is tricky because if not done right there will be no good documentation of the special day. My dad does wedding photography as an amateur hobby; wedding photography is not skill less, but can be done easily with practice by almost any amateur photographer. This article will take a look at 10 tips to make DIY winter wedding photography successful; however keep in mind DIY wedding photography takes copious amounts of editing after the ceremony.

1. Camera

Taking wedding photographs should be done with the right camera, not a regular point and shoot camera. I recommend using the Canon EOS Digital Rebel XTi, it takes high quality pictures and is relatively easy to use. This camera can be found at www.buy.com for $569.95, but you should check to see if anyone in the wedding party can provide this camera or a similar model to save on money.

2. Flash

Relying on the built in pop up flash in any camera is a recipe for failure; you will want to use an external flash for low lighting pictures, such as a church or an evening reception. Winter conditions outside will not require a flash due to the reflection of the snow, but it can be used if done right; however inside you will want a powerful flash. I cannot give a recommendation because certain flashes work for different cameras; therefore the flash will be determined by your digital camera choice. www.ritzcamera.com has a good variety of flashes, lenses, and cameras.

3. Lenses

Unfortunately DIY picture taking is not cheap and requires the proper zoom lenses for great photos from anywhere in the room. Buying any secondary lenses is not necessary, but they will make the pictures better. www.ritzcamera.com has a good selection of lenses; it is where I purchased mine.

4. Go Digital

The hardest part of DIY wedding photography is getting professional looking shots. Going digital allows for touchups on the pictures after they are taken so that they come out perfect. Going digital also saves on prints since all the photos can be saved on a flash drive or a CD.

5. Choose an artistic guest for the job

Capturing the right moment is what photography is all about; having a guest that is willing to take pictures who has an artistic eye is the best way to get quality shots. Do not expect a gift from the photographer as it takes hours of work to take and edit great shots.

6. Be aware of lighting conditions

Winter is the hardest time of the year to take photographs outside due to the reflective nature of snow and the brightness of the sun. Be creative on the angles of your photographs; many high end cameras also show the contrast ratio on the photos taken, look at the contrast to make sure the photos are coming out correctly.

7. Be aware of where the sun is

Do not shoot towards the sun or objects that are in the sun, it can cause shadows and some funky looking pictures. Just be aware of the sun and preview one or two pictures before taking more.

8. Capture photos with the theme

If your theme is a winter wonderland then capture that theme in the photos! Try to include shots of the bridal party and newlyweds in the natural theme of the wedding; also try to include guests in the same theme. Be creative with the shots, you may have to shoot at different angles to get the desired results.

9. Use the flash

Even in snowy conditions you should experiment with the flash for better pictures, the bright the background the more the object you are photographing will stand out. This may not always be the case; therefore you should check the pictures being taken to make sure they are coming out professionally.

10. Edit, Edit, Edit

No DIY photography is complete up completion of the ceremony! There are countless hours of editing that must be taken on to get professional looking results. If you do not have the proper computer skills try to find a guest that would be willing to help edit in exchange for their wedding present.

This site has some extra DIY tips that can help during a winter wedding; I did not cover many these tips, so it may be a good read: http://www.squidoo.com/weddingphotographyguide

Sources:

www.ritzcamera.com

http://www.squidoo.com/weddingphotographyguide, DIY Winter Wedding Photography

DIY Wedding Photography on a Budget


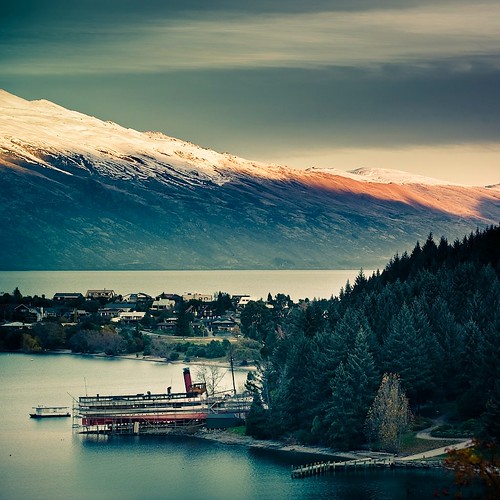
Cuba Gallery: New Zealand / landscape / mountains / lake / amazing / beautiful / nature / trees / sky / clouds / photography by â–ºCubaGallery


source


So, your wedding is fast approaching and you want memories that will last a lifetime. However, you are on a budget and don't have a lot of money to spend for a professional wedding photographer. You can still get professional-looking, creative, memorable pictures with DIY wedding photography.

The first thing to do is to find someone who takes great pictures. This doesn't have to do be a professional photographer. Many people have a "great eye" and instinctively know how to take great pictures. Think of friends or family members who you've complimented on their photography from vacations, for example. Another way to find a cheap wedding photographer is to look on local college bulletin boards, or post on them yourself in the art department or photography department. Many students have amazing talent, but since they are still a bit inexperienced, will be your wedding photographer for a fraction of the price of a professional wedding photographer. Some may even photograph your wedding for free, for no more than a free meal and use of your wedding pictures for their portfolio. You can also consider putting an ad on Craigslist for a hobbyist who is not a professional wedding photographer, but has an artistic eye and loves to take pictures. Get samples of work and negotiate a price you are both pleased with.

Whether you use a talented stranger or an artistically-inclined friend or family member as your wedding photographer, make sure they have a good camera. You may even consider purchasing a good quality, digital camera that you can give them as their "payment". If you need to purchase a camera for your DIY wedding photography, make sure you give it to the wedding photographer in plenty of time for them to learn the ins and outs of the camera, so they can adjust the settings. Digital cameras also allow for easy editing, so you or your DIY wedding photographer can edit your wedding pictures. Also, digital cameras have a large capacity to store many pictures, with a memory card they can hold hundreds of pictures, so you will have plenty of wedding photos to choose from to preserve your special day.

Another idea is to meet with your DIY wedding photographer to develop a plan of what you want photographed. Remember, since you will be saving a lot of money by not hiring a professional wedding photographer, you will have to do some of the work yourself. This includes providing the DIY wedding photographer with a list of what you want photographed. This may include photographs of the wedding rings, the wedding invitations, the bridal party, the groomsmen, the family of the bride, the family of the groom, the bride and groom's first kiss, the wedding service, etc. This will help you and your DIY wedding photographer be on the same page and know each other's expectations beforehand, so you get exactly what you want on your special day.

Also, encourage others to take pictures of your wedding. Some of the best wedding photography are those wonderfully candid moments caught by some of the guests. Some wedding couples choose to put disposable cameras on tables for guests to take photographs of, then ask that they leave the cameras when they leave the wedding reception. Some give the cameras out as wedding favors and ask that any great wedding photographs be sent to the married couple.

Lastly, consider the best of both worlds. You can hire a professional wedding photographer for a short period of time to take a few very specific pictures, then rely on your DIY photographer and wedding guests to take the rest of the photographs. This will eliminate a lot of cost for a professional wedding photographer. You can also opt to don your wedding attire a few days after the event and go to a studio to have a few professional pictures taken.

Remember, it doesn't take a professional photographer to take some amazing, creative, professional-looking wedding photography. Have a great day!